Our latest crafting project with the Cricut Maker is this beautiful watercolor cake stand.
But this is more than just paper crafts — this week we’re experimenting with heavy chipboard and the renowned Knife Blade.
This bad boy can cut up to 2.4mm thick material, which includes balsa wood, matboard, leather, craft foam and basswood. And, of course, chipboard.
Not only is our Cricut Maker cake stand pretty, but it’s also solid and hard-wearing. Exactly what you need when you’re balancing a sponge on top of it!
And to show you that anyone can make this decor with the right equipment, we’ve even tasked our intern (with her beautiful doggo) with making it for you in front of a camera.
You can check out the video here:
Let’s get straight into it…
Post Contents
What You Need
- Cricut Maker
- 3 pieces of 12″ x 12″ chipboard
- 6 pieces of 12″ x 12″ patterned watercolor paper
- Cricut StrongGrip Cutting Mat
- Cricut StandardGrip Cutting Mat
- Cricut Knife Blade
- Cricut Fine Point Blade
- Masking tape
- Spray adhesive
How to Make the Cake Stand
Find Project on Design Space
Luckily for us, this chipboard cake stand project is available for free on Design Space with a Cricut Access subscription.
Cricut Access is a $7.99 a month subscription which gives you access to over 50,000 images, hundreds of fonts and a bucketload of ready-to-make projects like this one. It’s one of the best ways to guarantee that you’ll make the most of your Maker.
Simply search for “cake stand” in the Projects tab and scroll down until you find this:
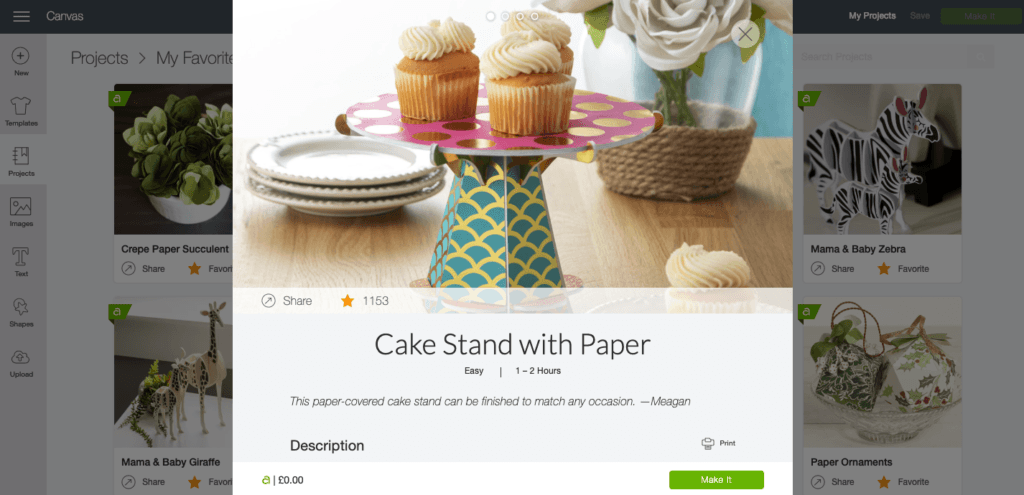
Click on the little green button in the right hand corner saying “Make It” and that will take you to the Mat Preview screen.
Cut Paper and Chipboard According to Instructions
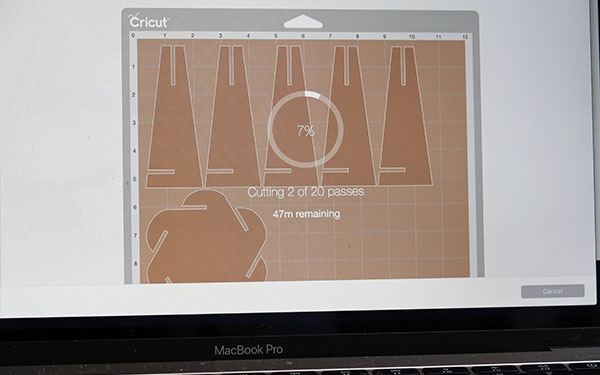
Mats 1, 2, 6, 7, 8 and 9 are all paper and cardstock and so will require application to the StandardGrip (or LightGrip) Mat and the Fine Point Blade.


Mats 3, 4 and 5, on the other hand, are chipboard and so will need the StrongGrip Cutting Mat and the Knife Blade.
Make sure that you use the correct settings and equipment for the different materials!
All you need to do is follow the instructions on screen and prepare your mats as directed.
When it comes to mats 3, 4 and 5, you’ll need to carefully switch out the Fine Point Blade for the Knife Blade and select “heavy chipboard” on the materials list. This selection will automatically calibrate the machine for the heavier material.
You’ll also need to secure the chipboard to the mat using the masking tape. This ensures that it doesn’t move from its position on the mat so all cuts are accurate.

The chipboard setting means the Knife Blade makes a whopping 20 passes in total, so be prepared for a bit of a wait…
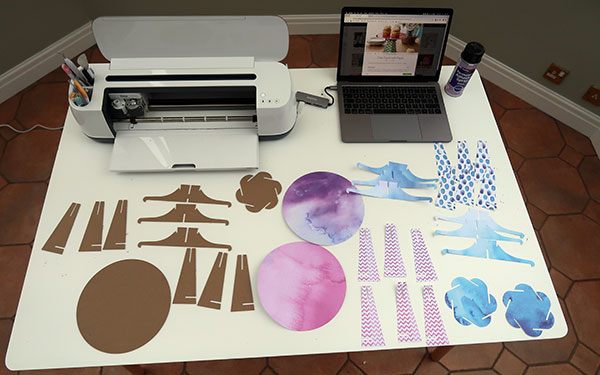
Eventually you’ll be rewarded with all of the individual cuts:
Adhere Paper to Chipboard
Now it’s time to lay down some newspaper or an old towel and bring out the spray adhesive!
You need to adhere each paper cut to its corresponding chipboard cut.
This can be a little fiddly to ensure that each piece is accurately glued together so take some time to be absolutely sure that each piece is where it should be. Eventually all these pieces will slot together so we don’t want any sloppy edges!
You should be left with these:

And note that this is just one side of the chipboard — you’ve got enough paper to cover both sides of the material.
Assemble the Components
Now it comes to the fun part — actually slotting each piece together!
This can take a little while to work out (especially as there are no directions from Cricut on exactly where to put each piece) so we’d recommend that you watch the video if you get stuck.
Essentially, you’ll need to start with the supports so start with the small circle with the flared edges and slot the support sides into each flair.
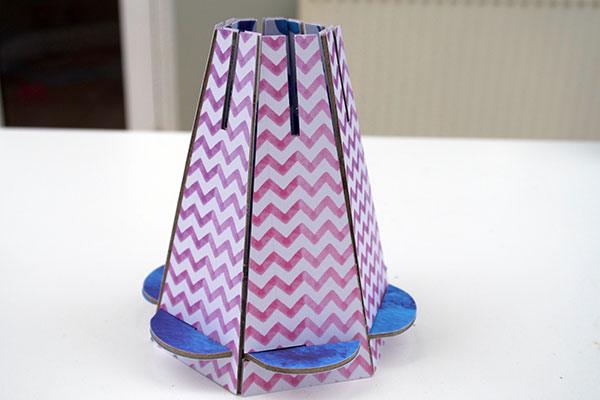
Then take the three armed supports and slot them into the top of the above structure in the appropriate order so that it will leave an even base on which to slot the final large circle into.
Voilà:

And then finally place the large circle on top, taking care to ensure that it’s fully fitted within the armed supports.
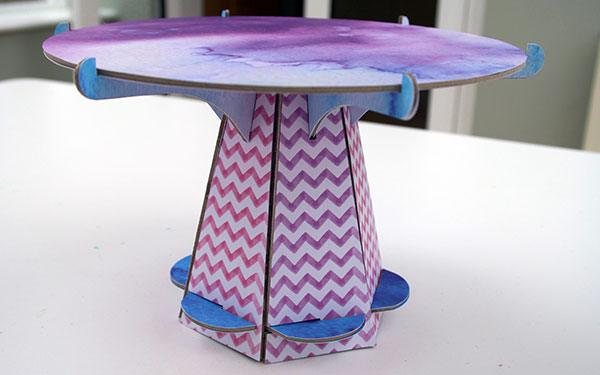
If you’re really concerned about presentation, you can even paint the sides of the exposed chipboard to ensure that everything looks sleek. We didn’t have time to do this and are fans of the rustic look so this will have to do!

All that’s left to do now is to add your cake or cookies to the top!
We’re thinking macarons could be a good choice here…
Have you made a cake stand with the Cricut Maker yet?
For more tutorials and guides aimed at helping you get the most out of your machine, be sure to visit our How To section.