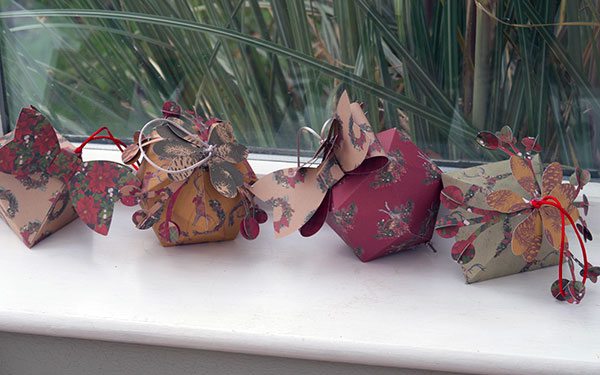
With just a week to go until Christmas, we’re putting the Cricut Maker into overdrive with all the decorations we’re making with it!
This week, we’ve been focusing on how to make Christmas tree decorations with the Cricut Maker.
Quick and relatively simple, these paper ornaments are striking thanks to their unusual shape and size. And they’re sure to look deliciously festive if you choose the perfect paper materials!
We persuaded our intern to have a go at the project and film it on video for you. You can watch her getting to work here:
In the meantime, we’ve also compiled this step-by-step guide so you can read along as you watch.
Let us know in the comments if you’ve got any questions!
Post Contents
What You Need
- Cricut Maker/any other electronic cutting machine
- Cricut LightGrip cutting mat
- Cricut Scoring Wheel/Scoring Stylus
- Red and gold cord
- 7 pieces of festive patterned cardstock 12″ x 12″
- Hot glue gun
Method
Find the Project on Design Space
First things first, you’ll need to log into Cricut Design Space and locate the project on Cricut Access.
We’d highly recommend a Cricut Access subscription (it makes a great Christmas gift for a crafter!). For those of you not in the know, Cricut Access is a subscription that gives you access to over 50,000 images and hundreds of fonts, as well as loads of ready-to-make projects, from just $7.99 a month.
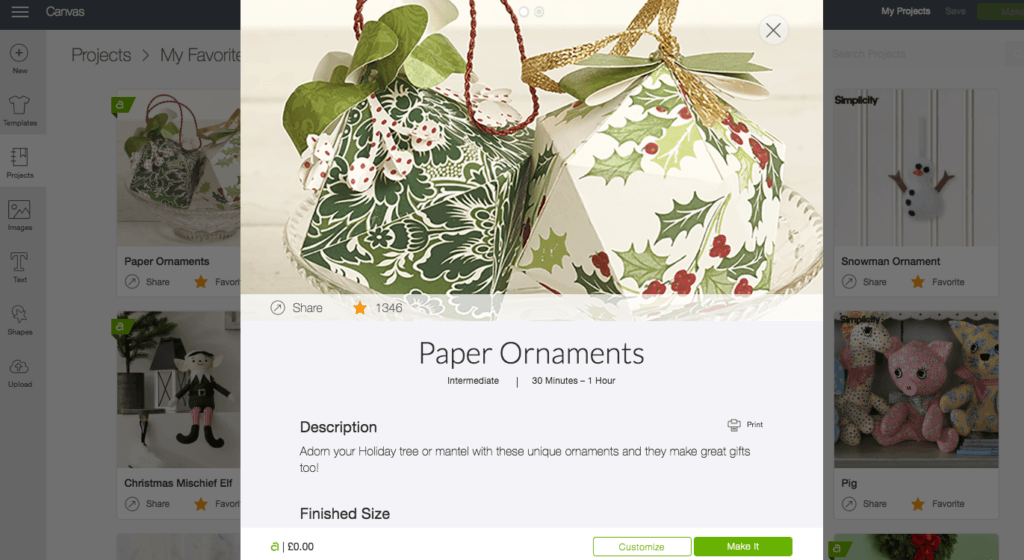
To find the project, simply search for “paper ornaments” within the app, which should bring you to this page:
Next, you’ll need to click on that little green “Make It” button in the left hand corner, which will take you to the mat preview screen:
Once you press “Continue” in the bottom left hand corner, your Maker will sync up with your laptop, tablet or phone and you’ll be able to select the type of material you’re using — probably light cardstock if you’re like us — and the tools you have available.
We don’t yet have the Cricut Scoring Wheel but you will be able to complete this project with the Scoring Stylus so no need to worry.
Time for Cutting
There are seven mats to load in total so simply cycle through each of these, following the instructions on-screen from Design Space.
Each design is pretty simple so we’d recommend selecting ‘Fast Mode’ for the quickest cutting time.
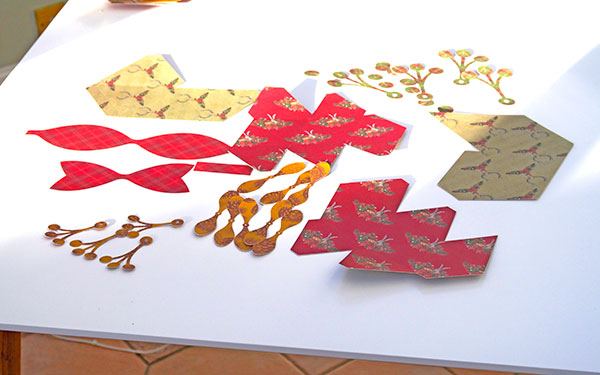
After the 7th mat has been cut, you’ll be left with an assortment of the following shapes:
Assemble the Boxes
This next part of the method is probably the trickiest part to get your head around — assembling the boxes together.
Of course, these aren’t just ordinary boxes — these are an icosahedron box and a octahedron box.
Just to confirm, the boxes are the larger pieces of cut material that have score lines and tabs across them. You’re making two boxes in total.
Firstly, you’ll need to fold along all the score lines and fold in the tabs on both sides of the boxes.
At this point, bring your hot glue gun up to temperature and start assembling the parts you have. You’ll need to glue along the tabs to fully affix both sides together.
We’d definitely recommend watching the video at the top of the page as this can be a little tricky to visualize.
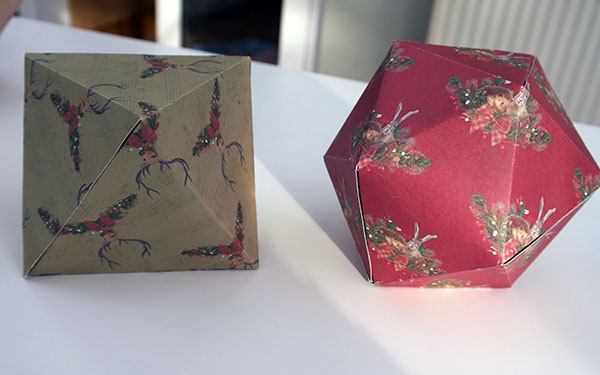
Eventually you’ll end up with two assembled boxes like this:
Pull the Cord Through the Boxes
The next step is to make a small incision at the top and bottom of each box that’s large enough to pull a 24″ long piece of cord through.
We simply used the sharp end of some wire cutters to punch through an incision before pulling through the cord.
Tie the cord in a secure knot at the bottom of the box, leaving a little wriggle room at the end. There should be enough cord left at the top to create a loop that’s long enough to hang off your Christmas tree.
Attach the Mistletoe
As well as the box designs, you will have also cut out a number of smaller shapes that will come together to make mistletoe branches.
Simply thread through the cord through each branch so both boxes have some mistletoe on one side.
You’ll be able to slot in some small berries in the mistletoe slits to make them appear 3D.
Attach the Bow Topper
The final flourish on this project is to assemble and attach the bow topper to one of the boxes.
The bow is comprised of the three cuts you made on the first mat — simply fold the larger piece in on itself to create a 3D base and then, using the hot glue gun, affix the smaller bow to the middle of your shape.
Finish it off by wrapping the smaller rectangle around the middle to keep it secure, and then glue the entire structure to one of the boxes — perhaps the one with the smaller mistletoe branch.
Finally, you’ll need to tie off the cord on the top of each box in a loop so it will be able to hang easily off your Christmas tree.
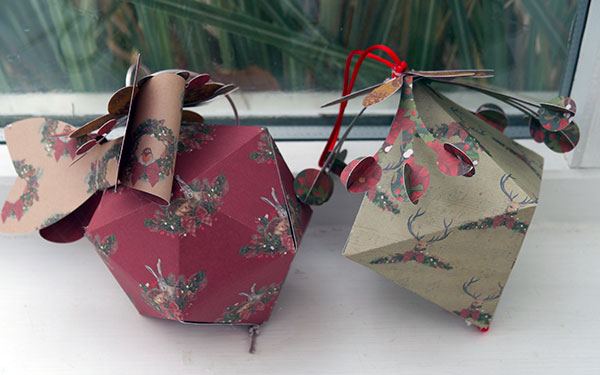
Eventually, you’ll end up with a couple of tree decorations that look like this:
And Here’s a Few we Made Earlier…
Ta-da!
Have you made any Christmas tree decorations with the Cricut Maker this year?
For more tutorials and guides aimed at helping you get the most out of your machine, be sure to visit our How To section.
