If you’ve been nosing around the crafting community for the past few weeks, you may have heard mention of Cricut Infusible Ink — a brand new product from Cricut.
Word on the street is that Infusible Ink is due to revolutionize the world of heat transfer and make for more professional results than you could ever imagine.
Intrigued? Want to know if the rumors are true?!
We’ve got the complete low-down…
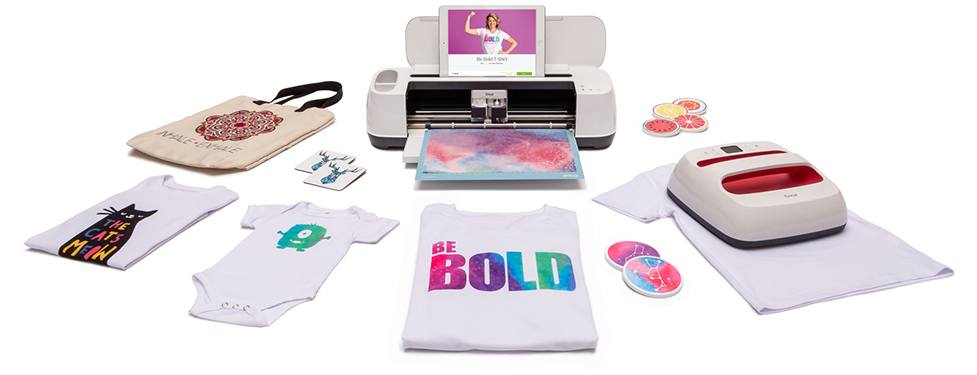
First things first, Infusible Ink isn’t a stand-alone product like you might imagine — it’s a system.
You may be aware that Cricut have been making moves for a while in the heat transfer game.
But the one thing holding the Cricut machines back from actually producing professional level heat transfer product is the heat transfer vinyl that we’ve had to use.
HTV isn’t a poor product by any stretch — but, by its very nature, it doesn’t have much longevity.
It sits on top of the material — whether that’s a t-shirt, tote bag, cushion or baby gro — and will naturally lose its lustre after lots of wear and washing. The color will fade and the edges of the vinyl might begin to peel away from the fabric.
Very annoying — particularly when you’ve spent all that time, effort and money making the product in the first place.
Infusible Ink promises to leave these concerns behind.
So… what is it exactly?
Cricut Infusible Ink actually merges with the fabric and becomes one with the product you’re making. That means no color fading and definitely no peeling after a few turns in the washing machine!Just like the name suggests, the ink actually infuses into the fabric. Exactly like a printed t-shirt you’d buy from your favorite store.
Here’s a cool video introduction from Cricut:
Cricut Infusible Ink is made of dry ink that, when activated with the heat of a heat press machine, will transfer into the fabric material of your choice. Essentially, it dyes the fabric.
This dry ink is held in the transfer sheets and markers that are part of the system.
Infusible Ink can work with both the Cricut Maker 3 and the Cricut Explore Air 2.
If you’re using the Maker, you’ll need to select ‘Infusible Ink Transfer Sheet’ when selecting what material you’re cutting in Design Space.
If you’re using the Explore Air, you’ll need to turn the dial on the outside of the machine to ‘Custom’ before selecting the same material in Design Space.
What Supplies Do I Need?As Infusible Ink is a system, it’s made up of a number of products that you’ll need before you start using it. But don’t worry — these are all low-cost so won’t add up to anywhere near the cost of a new machine!
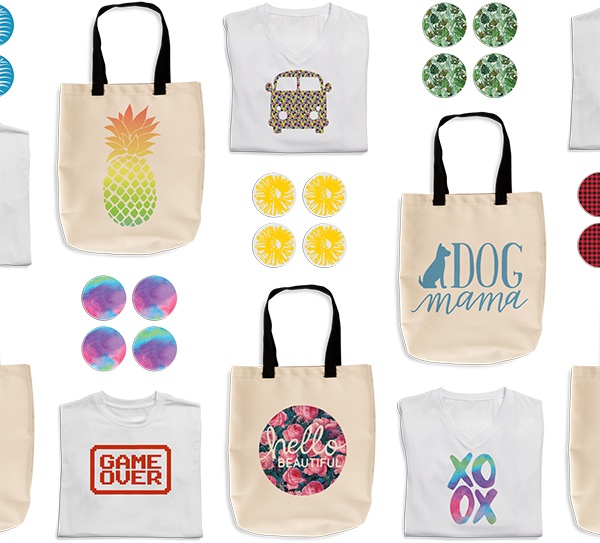
Cricut are releasing a number of plain and patterned transfer sheets for you to choose from.
Michaels currently have the following patterns in stock:
- Black Botanicals
- Mermaid Rainbow
- Watercolor Splash
- Rainbow
- Cherry Red
- True Blue
- Animal Brights
- Shaylee
- Steel Plate
- Bright Green
- Cabbage Rose
- Wildflower
- Tropical Palm
- Rose Pink
- Ultraviolet
- Leopard
- Western Sweetheart
- River’s Edge
- Triangle Brights
- Buffalo Check
- Rainbow Cheetah
- Warm Grey
- Carbon Fiber
- Tropical Floral
- Jungle Safari
- Animal
And you can browse the entire collection on Cricut’s website too.
Check PricesThere’s certainly a lot to choose from!
Infusible Ink MarkersThe markers — or pens — are the next part of the Infusible Ink puzzle and are used just like any other pen or marker you use with your Cricut machine.
Just like the transfer sheets, they contain the same dry ink that will dye into the fabric of your base material once they’ve been activated using a heat press machine.
They’re available in Basic and Neon color sets.
The pens can be used to draw your own images that you’ve uploaded to Cricut Design Space.
They need to be used on laser copy paper.
Check Prices Infusible Ink Heat Resistant TapeYou’ll want the specialist heat resistant tape that Cricut are offering if you decide to use the Infusible Ink Markers as this keeps the pens and paper in place while they’re drawing.
This is especially important as laser copy paper is particularly slippery in comparison to normal paper and cardstock.
The tape is less necessary if you’re just using the Infusible Ink transfer sheets as they come with a secure backing that adheres itself firmly to your StandardGrip Mat.
Compatible BlanksCricut have created a number of Infusible Ink compatible blanks for you to transfer your designs onto.
It’s unclear at the moment whether Infusible Ink will work on other materials or not, but we’ll definitely be experimenting with this once we have our hands on the system.
Currently, Cricut are offering blanks in the following formats:
- Tote bags
- V-neck t-shirts
- Crew neck t-shirts
- Baby bodysuits
- Coasters (round and square)
The final supply you need to complete your Infusible Ink adventure is a heat press machine.
This could be anything from an iron to a professional heat press.
Personally, we’ll be using the EasyPress 2 machine from Cricut — this is what it’s made for, after all!
Firstly, you’ll need to create your design in Cricut Design Space.
You might choose to create something yourself from scratch, or upload someone else’s file to use instead. Alternatively, take a look at the ready-to-make Infusible Ink projects that are already held in Design Space.
Just like with all heat transfer projects, you’ll need to mirror your design to make sure that it’s the correct way around once it’s transferred to your final material.Finalize your design and proceed through to the mat preview area before you start cutting.
At this point, you’ll need to select what material you’re using.
Make sure to select Infusible Ink Transfer Sheet. You’ll need to turn the dial on the front of the machine to ‘Custom’ beforehand if you’re using the Cricut Explore Air 2 machine.
If you’re using an Infusible Ink marker, select Laser Copy Paper instead and adjust your tools to Infusible Ink Marker. Design Space will then prompt you to add your marker into the B clamp.
Next, you’ll need to load a Cricut StandardGrip mat with either an Infusible Ink transfer sheet or some laser copy paper if you’re using an Infusible Ink marker.
If you’re using a transfer sheet, be sure to adhere it liner side down, with the patterned side facing up.
If you’re using laser copy paper, use tape to keep it in place during the cutting process.
Load your mat into the machine and press ‘Go’. Let the cutting begin!
Just like with any other Cricut project, you’ll need to weed your design once it’s finished cutting.
Be super careful not to tear any part of the design as you weed and also make sure that your hands are completely dry — moisture can ruin the dry ink component of the Infusible Ink.
Before you transfer your design onto its final destination, you’ll need to make sure that the material is 100% ready to receive the transfer.
Firstly, make sure that the fabric or material is completely clean and free from any debris.
Heat transfer professionals recommend using a lint roller to remove any microscopic pieces of lint to make the transfer as smooth as possible.
At this point, you’ll want to preheat your heat press machine/EasyPress/iron to make sure that the heat will be distributed evenly when it’s time to go.
Taking your cut design, lay it onto the base material in the exact place you want it to be positioned.
If you’re using a transfer sheet, the liner should be facing up and the pattern facing down.
If you’ve used a marker, use some heat resistant tape to attach your paper securely and, again, the design should be facing down.
Then take a piece of butcher paper (this is included with every purchase of Infusible Ink transfer sheets) and fully cover the area of your design. The paper should be larger than the heat plate you’re using so you don’t damage the material at all.

Then, take your pre-heated heat press (or heat device of your choice!) and press down until the design has been fully transferred.
This is where the EasyPress 2 really comes into its own as you can set the temperature and time exactly for whatever your project requires. These details will be outlined in Design Space or wherever you’ve found the Infusible Ink project.
A heat press should allow you the same amount of precision, although it will be more of a guessing game if you’re using a normal household iron.
Once you’ve finished with your heat press, slowly and carefully remove the press from the butcher paper and set it down somewhere to cool.
Similarly, you’ll now need to wait for your design to completely cool on your fabric before you remove the butcher paper and transfer liner.
Don’t be too hasty or you’ll risk smudging the ink!Once everything’s cool, carefully remove the butcher paper and then use a pair of tweezers to carefully remove the liner from the transfer paper design.
Once the liner has been removed, you’ll see just how bright and bold your final design is.
It’ll be ready to wear immediately. And according to the Cricut Infusible Ink promises, won’t fade, peel or crack, no matter how much you wear it or wash it!
Take a look at Angie Holden using the system:
The Infusible Ink system is available now exclusively at Michael’s.
Here’s what each part of the system is priced at currently:
- Infusible Ink Markers [pack of 5]: $14.99
- Infusible Ink Transfer Sheet Patterns: $12.99-$17.99
- Cricut Heat Resistant Tape: $6.99
- Cricut Women’s Blank V-Neck T-Shirt: $9.99
- Cricut Blank Crew Neck Men’s T-Shirt: $9.99
- Cricut White Blank Youth Crew Neck T-Shirt: $7.99
- Cricut Large Tote Bag: $11.99
- Cricut Medium Tote Bag: $9.99
- Cricut Baby Bodysuit: $6.99
- Cricut Round Coaster Blanks: $12.99
- Cricut Square Coaster Blanks: $12.99
We can’t wait to test out the Cricut Infusible Ink system for you to see how it really stacks up against traditional heat transfer vinyl.
Stay tuned for plenty of tutorials!
Have you tried Cricut Infusible Ink yet?
Looking to get inspired for your next craft project? Check out our Inspiration board packed full of freebies, cut files and craft deals for every occasion!
Product is limited to polyester material. Cricuts blanks are very pricey. Other than that it makes dye sub available to crafters.
Go to PRO WORLD and check out sublimation for blanks -very reasonable prices.
Also buying shirts at the store that have at least 90% polyester will work the same.