If there’s one question we hear every single week, it’s usually something to do with how to use a Cricut machine.
Specifically, the Cricut Explore Air 2 and Cricut Maker 3.
One of the things we love about these vinyl cutting machines is that they’re so simple to use — but they do take some getting used to, particularly if you’re a beginner to craft cutting.
So with that in mind, we’ve compiled this huge beginner’s guide on how to use the Cricut Explore Air 2 and Cricut Maker.
We’ll get right down to basics, breaking each step down into the bare necessities so you can find what you’re looking for as easy as possible.
You’ll be cutting like a pro in no time!
Let’s get right down to it.
Post Contents
How to Use a Cricut: Setup
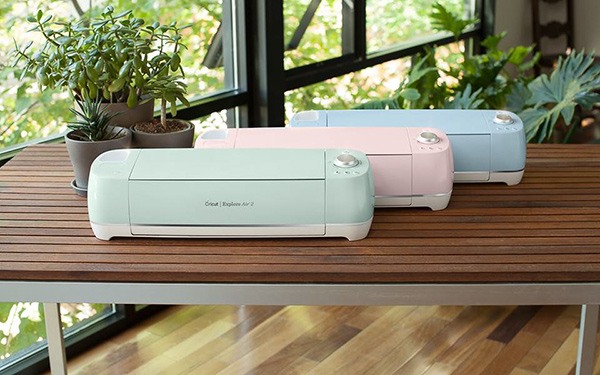
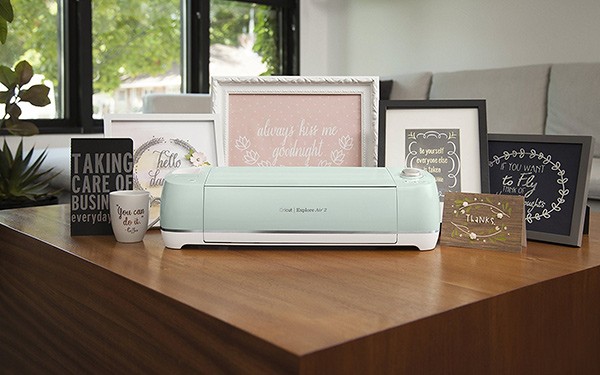
Cricut Explore Air 2
First things first, let’s take a look at the machine itself and work out what each feature does.
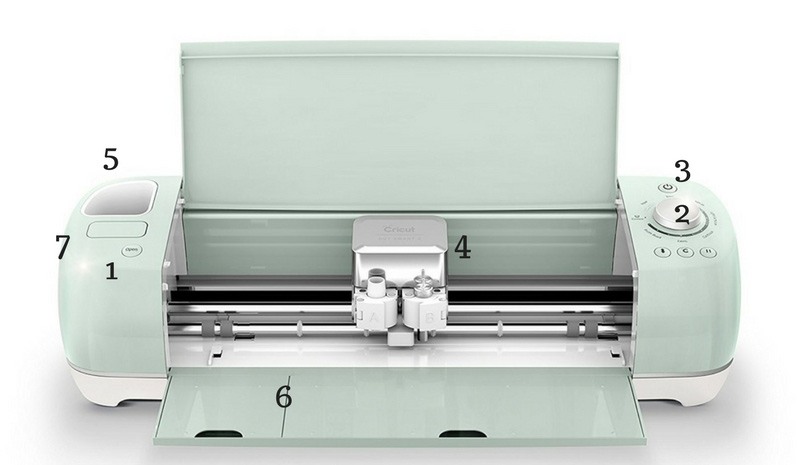
- Button to open lid
- Smart Set Dial
- Power on/off
- Dual carriage (this is where the blades and pens are housed when you’re using them)
- Accessory cup
- Two accessory drawers
- Cartridge port (into which you can plug any Cricut cartridges)
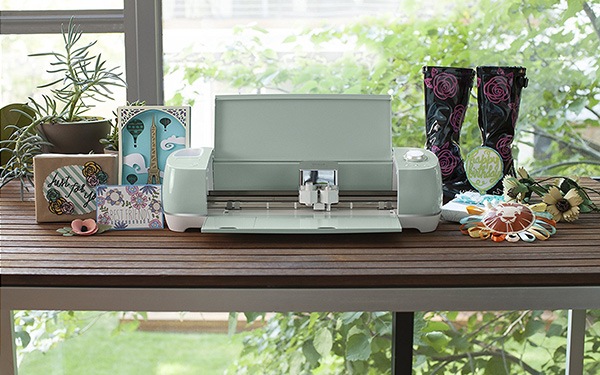
Cricut Maker
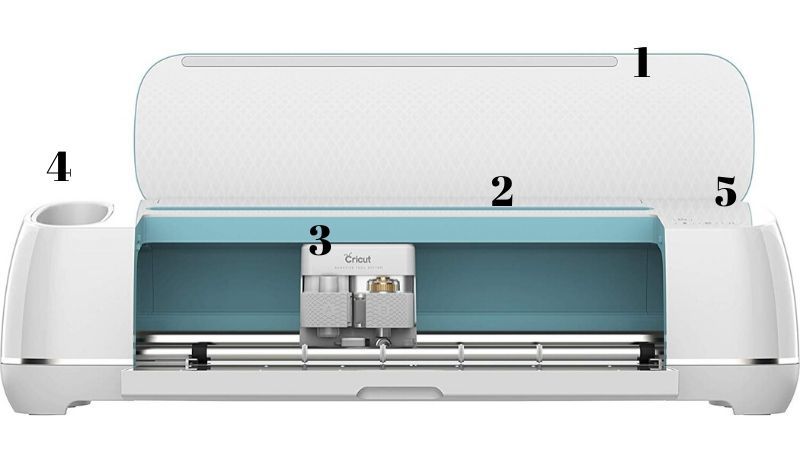
As you can see, it’s a little sleeker and less cluttered than the Explore Air 2.
- Soft open lid
- Tablet/phone compartment with charging port
- Dual tool carriage
- Rubber-bottomed tool cups
- Control panel
Creating Space for the Cricut
Now you’ve unpacked your brand new Cricut machine, you’ll need to set it up so it’s ready to start cutting.
Whether you’ve got a dedicated craft room or you’re simply crafting on your dining room table, all you need is a flat surface and access to power — remember you can always use an extension lead if you’re struggling to get close enough to a socket!
Make sure that there’s some free space around the Cricut so you can load mats in and out of the machine easily.
Once it’s in place, you can plug the machine into a power outlet (there’s a power cable included with every purchase) and press the ‘open’ button on the lid of the Explore Air 2 (feature #1 in the illustration above) or gently open the Maker’s lid to open up your brand new machine.
Nearby, you need to set up the computer that you’ll be designing on. This could be a full desktop computer, a laptop, tablet or even your phone.
One of the great things about both machines is the fact that they’re wireless and so don’t require you to link up your computer and the machine in order to start designing.
Once you’ve logged into the Design Space app, you’ll be able to link your computer and the Cricut together wirelessly.
How to Use Design Space
Included in the package with your brand new craft cutting machine will be a piece of paper directing you to download Cricut Design Space.
Just in case you can’t find it, you’ll need to visit https://design.cricut.com/setup on whatever computer, laptop, tablet or phone you’ll be using to create designs for your Cricut.
This link will walk you, step by step, through the set-up process and will even show you how to plug in and power on your machine in case you haven’t done that already.
Firstly, you’ll need to make sure that Bluetooth is enabled on your computer, tablet or phone.
Depending on the type of model you’re using, you can generally find the Bluetooth feature under ‘Settings’ — just make sure that it’s on.
If you haven’t already, turn on your Cricut by briefly holding down the power button on the right hand side of the machine (#3 in the illustration above and in the control panel on the Maker). With your phone or computer’s Bluetooth settings open, look out for your machine to pop up in the devices list. When you see it, click on it and choose to connect.
You may be prompted to enter a passcode at this point: use 0000 if so.
If, for whatever reason, you can’t get the Bluetooth to work or you simply don’t have it on your device, simply connect your computer and the Cricut using the included USB cable instead.
Once you’re done, your computer and Cricut will be linked together and ready to go.
All that’s left to do now is start designing!
What’s great about Design Space is that it’s specially designed for beginners and so provides step-by-step guidance on how to start and finish every project. It’s so easy to use that more experienced users actually find it a little restrictive — but there’s no need to worry about that until later!
Using the Design Space App
It’s ideal for people who travel or for those who want access to their Cricut account even when they don’t have internet access.
In order to design offline, simply make sure that you download any images and fonts you want to use beforehand. To save projects for offline use, tap the save icon and select ‘save as’, then save to your device (as opposed to the cloud). When you want to access your projects while you’re offline, simply pull down the categories menu and select ‘My Projects on this iPad’ (or whatever device you’re using) and open it from there.
When you’re in online mode, you’ll see the simply hundreds of different projects available in the app for you to enjoy, as well as the opportunity to create designs entirely from scratch using the ‘new canvas’ feature.
Your First Cut
Most first-time Cricut users will start their cutting career by completing the ‘Enjoy Card’ Project that comes included with the machine on purchase.
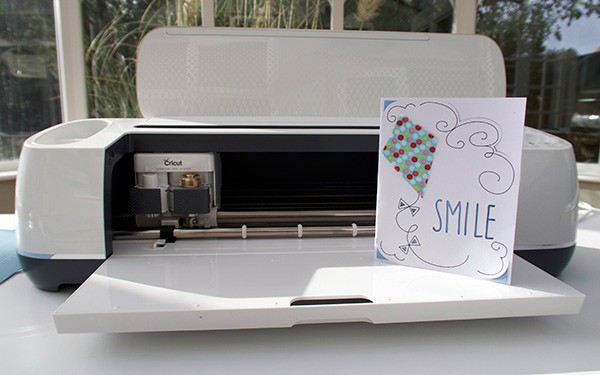
This is a great way to ease yourself into the world of craft cutting and expose you to the different aspects of using the Cricut Machine.
After you’ve linked up your computer and the Cricut, Design Space will prompt you to start this project.
All you need to do is follow the step-by-step instructions that pop-up onscreen, and use the tools and accessories that were provided in the package.
Easy peasy!
Once you’ve completed your first cut, you’ll likely be feeling a little more confident to take on increasingly interesting and difficult projects.
Here are a couple of excellent videos that will set you up to be a Cricut design supremo:
How to Use the Cricut Explore Air 2
Now it’s time to master some of the exclusive features that are found on the Cricut Explore Air 2.
The Smart Set Dial, found on the right hand side of the machine, is a feature guaranteed to make your life easier.
Essentially, it’s a material selection dial that is pre-programmed with the correct settings for whatever material you’re using that day.
If, for instance, you’re cutting a card, you’ll turn the dial to select ‘Cardstock’. The machine will then automatically select the correct blade settings — including depth, speed and force — so you don’t have to.
Cricut have smartly included the most-used materials on the dial:
- Paper
- Vinyl
- Iron-On
- Light Cardstock (for paper 60-65 lbs)
- Cardstock (for paper 80-85 lbs)
- Fabric
- Poster Board
You’ll also spot half settings between the materials on the dial. This is for when you need either a little less or a little more pressure than what the programmed settings are providing.
If, for instance, you’re cutting some light cardstock but the blade isn’t fully cutting your design, you can select the half setting between Light and Cardstock. Or if you’re cutting some poster board and the blade is exerting too much pressure by cutting up your mat, simply select the setting between Fabric and Poster Board.
If you’re using another material — and let’s face it, you’re able to use well over a hundred different materials with this machine so why wouldn’t you? — all you need to do is turn the dial to the ‘Custom’ setting.
You can then select the exact material you’re using from the huge drop-down list in Design Space — and again, the Cricut will automatically adjust its blade settings so you don’t have to.
Another of the amazing features of the Cricut Explore Air 2 is the Fast Mode.
When in Fast Mode, the Explore Air 2 can write and cut up to twice as fast as it normally can — that’s some real time savings!
It’s not available for every single material, however, and is best used on simpler designs.
You can use Fast Mode with the following materials:
- Vinyl
- Iron
- Light Cardstock
- Cardstock
In order to enable Fast Mode, you need to go to the Set, Load, Go screen and check the box under the Dial Position indicator.
If you start cutting and have forgotten to enable Fast Mode — or you want to stop it — simply press the Pause button under the Smart Set Dial and turn it off in Design Space.
One thing to be aware of is that the machine works quite loudly when it’s in Fast Mode — it’s probably best to avoid using it late at night if you live with other people! 😂
When you first receive your brand new Cricut Explore Air 2, you’ll see that the blade is already installed in its housing and ready to cut.
But at some point, the blade will dull and become less effective — and at that point, you’ll have to replace it.
How long this takes completely depends on how often you use the machine and the types of materials you typically use with it. We would say that the premium German carbide blades Cricut use are of a very high quality and are definitely durable, however.
Changing the blade on the machine is actually very easy, so there’s no need to panic about it.
The action happens in the cartridge (#4 in the top illustration) which you’ll see is divided into two sections: A and B.
A is the accessory cartridge, which is pre-installed with an adaptor which can fit Cricut pens, scoring stylus and various other accessories too.
B is the blade housing.
At the top of the housing, you’ll see a thin plunger. Push this in and carefully remove the small blade which will now be released at the bottom of the housing.
Remember to dispose of it securely.
Next, remove the green protective cover of the new blade and carefully insert it back into the shaft of the blade housing, where it should automatically lock into place.
Then drop the blade housing back into cartridge B and close the gray clamp, ensuring that the housing is flush with the top of the clamp. All done!
More Cricut Explore Air 2 Resources
And there you have our beginner’s guide on how to use the Cricut Explore Air 2.
Check out these similar articles if you’re ready for some more specialist information, and feel free to ask any questions in the comments below!
How to Use the Cricut Maker
The Cricut Maker is a very similar beast to the Explore Air 2 and, if anything, is actually more intuitive and easy to use.
There are a couple of major differences however.
More Cricut Maker Resources
It’s easy to get overwhelmed by the Cricut Maker as it can do so much — but don’t let that put you off.
It’s actually really simple and intuitive to use. If you’ve already mastered the Explore Air 2, the Maker will be a cake walk in comparison.
Take a look at some of our tutorials and resources if you want to dive a little deeper…
Any questions on how to use a Cricut?
For more tutorials and guides aimed at helping you get the most out of your machine, be sure to visit our How To section.
I LIVE IN HACIENDA HEIGHTS, CALIF. DO YOU KNOW WHERE I CAN TAKE CLASSES FOR THE CIRCUT CRAFT MACHINE FOR BEGGINERS
I was watching the videos and I thought it said that you cannot print from your I Pad. It said that you have to hook up to a computer. Is this correct information? All I have is the I Pad.
Thank you
I was watching the videos and I thought it said that you cannot print from your I Pad. It said that you have to hook up to a computer. Is this correct information? All I have is the I Pad.
Thank you
I know this sounds stupid, but there’s a button to open the machine; how should you close it? I appreciate any help. Thanks!
Hi, can i use this machine to cut out cake toppers?
You certainly can Robert!
Hi, Can you tell me how I can find a program to work with the machine to cut out housing coordinates with latitude and longitude? Thanks
I bought my circuit used on line. Do I still use the new machine set up or set up a different way?